The Guitar Rig of Your Dreams – Custom Racks
March 24, 2020
WE’VE BEEN ENTERTAINING ourselves with the thought of starting a Custom Racks service for some time. Racks and pedalboards follow the same basic principles, when it comes to the wiring and powering, and they also suffer from the same type of problems. Inner need of getting a chance to build a large effects rack has lived in our minds for a while, and in the end we got lucky.
Two years ago, we had designed a really large “freely breathing” pedalboard for one of our clients. This was a serious board, configured to controls the players considerable effects layout, as well as switching three different amplifiers on and off.

For the most part the effects were run in series in front of the amp, but the signal was also routed through main clean amp’s (Budda) effects loop.

In addition to the Budda, the rig also used Bogner Ecstasy 101B and a Marshall JVM410. The Bogner and the Marshall each had their own TC Electronic G-Major rack effect plugged into the FX loop. Both TCs were only producing a little bit of reverb, and the pedalboard setup wasn’t meant to, or even able to, switch the G-Major’s settings.
During the process the original clean amp Budda was replaced by a PRS John Mayer J-MOD 100, but we kept also Budda as a fouth amp in the system.

Because this rig offered a huge amount of potential, our client decided to have his whole setup upgraded. He was hoping a solution to control simultaneously all of the pedals on the pedalboard, the rack effects, amp channel switching, as well as switching the amps’ FX loops on and off. In short: total control.
He also owned a Fractal Axe FX II XL+ rack effect and a separate power amp, which had both been installed in a compact rack for easy gigging. He hoped to be able to integrate both devices into the new rig, along with his Line 6 wireless unit. He also hoped to have an option to add a fourth guitar amp, should he so desire.
This would be the largest rig we had assembled to date.

A TRADITIONAL PEDALBOARD, where the effects are wired in series, is easy and intuitive to use, but if you need to switch several effects on or off at the same time, guitar playing often turns into tap dancing. This is where programmable true bypass loopers come in. The effect pedals are connected to the true bypass looper’s FX loops, allowing you to turn pre-programmed combinations of pedals "on or off" with a single footswitch. The true bypass looper also allows for the simultaneous transmission of MIDI commands, which is great for use with MIDI-enabled equipment to switch their presets.

To be able to use all effects and amps in their full potentional, installation of a MIDI-cabable bypass looper was a must. This unit would become the "control center" of the whole rig.

Our choice was Musicom Labs’ EFX MK V-controller, which had enough loops to control all the board’s pedals. Additionally, this unit could also control rack effects and change amplifier's channels with MIDI-commands. One more advantages of this true bypass looper is the capability to reassign the order of the loops for each patch, adding even more flexibility to build your sounds.

Building Process
After mapping out the approximate structure of the whole project, we split up the whole into sensible smaller segments, which we would then plan in detail, and build one by one.
- First, we would focus on reconfiguring the pedalboard
- Then we would turn our attention to each rack shelf/drawer one at a time
- Lastly we would wire up all Neutrik "D" series rack panels before installation, so there wouldn’t be any soldering inside the crammed confines of the rack.

Devices used in this project
Trying to foresee and prevent any possible problems is a crucial point in designing a rig of this size. In our experience, the more demanding a project is, the more straightforward all solutions should be. The less power-splitting, the less long MIDI-lines, and the less effects hooked up in series you have to deal with, the more reliable your system will be in the end.
We decided to continue the Lehle switching chain and to extend existing Lehle 1@3, we installed a Lehle Dual SGoS in the rack to make adding a fourth amp possible, and to make use of the Axe FX unit.

To get additional bypass loops for the effects before the amp inputs, we chose the Morningstar ML5, which we placed on the same rack shelf as the effect pedals connected to it.

As the main true bypass looper in the rack for the amplifier's FX loops, we used a Voodoo Lab GCX, which can be considered an industrial standard.

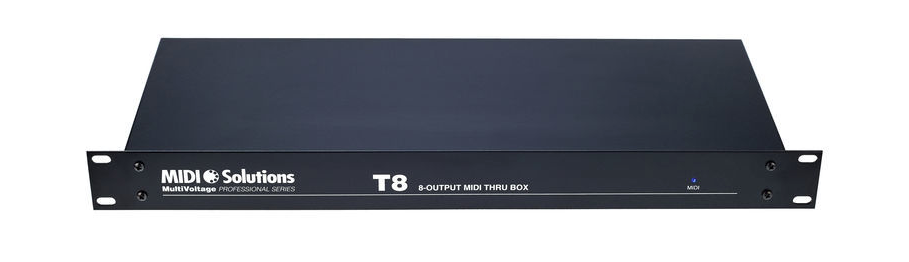
As we are well aware of the problems very complicated MIDI chains can throw up, we chose a MIDI Solutions T8 MIDI-splitter to route the MIDI signals to the effect units.
Powering the rack
On the pedalboard, we used the same reliable power supplies than before, a Voodoo Lab Pedal Power Mondo and Pedal Power 2 Plus. In the rack, we chose to power the effects using a Cioks DC7 power supplies. This unit is very compact, yet powerful, and they don’t induce electromagnetic noise into the signal.

Each of the two effect rack shelves was powered by its own Cioks DC7 power supply unit, so we didn’t have to run thin DC-cables inside the rack.

The only power line going into the rack is the main AC-supply from the wall. Cioks power supplies and all other equipment are powered from inside the rack and can be switched on or off with the one switch.

Rack Wiring
As the rack shelves were meant to be used like drawers, we had to leave slack in all the cables, to guarantee smooth movement of the shelves, without pinching any of the wires.

We bundled the cables into rope-like strands, using insulating tape, and then carefully twisted and turned the strands, so their inherent tension would force them to stay out of the way by themselves, each time the rack shelf would be pushed back into place.
We also added strain relief to these cables, both at the back end of the shelves, as well as on the shelves themselves, to prevent any accidental unplugging of connectors.

Preventing hum and hiss
To prevent any ground loops from occurring we installed one Lehle P-Split in the rack, which made it easy to defeat any possible ground loops between the three amps, leaving us free to decide which amp would be connected to ground with the signal cable. Because this unit is passive, meaning it does not require any power source to work, it is very easy to place it exactly where it's needed the most. The other amps would be isolated using the Lehle units installed on the rack shelf.

Even though we always try to take all possibilities into account, such a massively involved rig will always produce a certain residual amount of stray noise. To cater for this we had included a pair of ISP Decimators in our signal flow.

The Decimators make it easy to cut down on any hiss coming from the gain section pedal effects, as well as from the amplifiers’ preamps themselves, before it can contaminate the FX loop signals. With this final stroke the rig was ready for a test run.
The signal flow on the pedalboard
The signal is either fed into the pedalboard directly from the guitar with a cable, or via the wireless receiver that has been placed on the same rack as the Axe FX unit.

The first pedal in the chain is a Fulltone Clyde Wah, which is followed by a Sonic Research Turbo Tuner. From there the signal is fed into the Musicom Lab MK V true bypass looper input.


The Musicom Lab’s loops have been assigned the following effects in this order:
1. Xotic SP Compressor
2. MXR EVH 5150 Overdrive
3. Friedman BE-OD
4. Fulltone Full-Drive 2 Mosfet
5. Vertex Steel String
6. Klon KTR
7. MXR EVH Phase
90
8. MXR EVH Flanger
9. Fulltone Deja-Vibe
A TC Electronic Ditto X2 is fed with the Musicom Lab’s output signal. The Ditto’s output is then sent to the rack in a cable snake.
The signal flow in the rack
The signal enters the rack via a Neutrik D-Series jack on the front panel, from where it is sent onwards to the Morningstar ML5, which sits on the first rack shelf.

The first rack shelf
The Morningstar ML5 is remote controlled from the pedalboard with MIDI. The last effects before the amps’ inputs are placed in its loops. The Morningstar ML5 runs the following effects:
1. MXR Analog Chorus
2. ISP Deci-Mate
3. Way Huge Aqua Puss
4. Keeley Katana Mini Boost
5. This loop was left empty for potential future additions

Splitting the signal
Up to this point, the signal path has stayed the same for all three amps, meaning all the above effects can be used with any chosen amplifier. The signal is now splitted, so it can be sent to each amp. After the signal hits the each amplifier's preamp it is divided so, that the effects placed in an amplifier’s FX loop are only used with the amp in question.
The first rack shelf sports a Lehle 1@3 SGoS and a Lehle Dual SGoS. These Lehles made possible to split the signal into up to five destinations. The units can also be remote controlled via MIDI commands, which makes it easy to programme amp switching into the Musicom Lab’s presets.
Lehle Dual SGoS:
A out: to Amp D
B out: Lehle 1@3 SGoS
T out: to Axe FX
Lehle 1@3 SGoS:
A out: to Amp A
B out: to Amp B
C out: to Amp C
All extrenal connectors for the amps’ inputs, their FX loops, MIDI connections and other functions have been placed in the top row at the back of the rack, using a Neutrik D-Series panel.

The second rack shelf
The effects units running in the amps’ FX loops have been connected to a Voodoo Lab GCX rack true bypass looper unit. These effects are switched on and off using MIDI commands from the pedalboard. Also on the same rack shelf sits a G-Lab MAC 4.4 relay switcher, which is used to switch the Bogner’s amp channels. This unit can be also controlled from the pedalboard.

Because the Voodoo Lab GCX features separate in- and outputs for each of its loops, it is possible to use this single rack unit-sized true bypass looper for all amplifier FX loops at once.

The amp-specific effects running in the Voodoo Lab GCX’ loops are:
Amp A: PRS
1. Boss CE-2W
2. Eventide Timefactor
3. Boss DD-7 Digital Delay
4. Strymon BigSky
Amp B: Marshall JVM
5. ISP Deci-Mate
6. TC Electronic G-Major #1
Amp C: Bogner:
7. TC Electronic G-Major #2
The GCX’ eighth loop has been left vacant. It could be used in the future for an additional effects unit or to switch the future 5th amplifier's channels or an reverb, that you would normally control with an amp’s own footswitch.

4th amplifier (D) and Axe FX
Lehle Dual SGoS is used for a fourth amp with this rig, as well as integrate the Axe FX unit in the system. The original clean amp Budda was replaced by a PRS John Mayer J-MOD 100, but to put the Budda's FX loop to good use, we connected the Axe FX directly to it, using the connectors on the rack back panel.
Interesting enough, the Axe FX could also be used independently, using its dedicated power amp and monitor speakers, and other presets using the unit as an effect processor "only" inside the Budda’s FX loop.

MIDI
The Musicom Lab MK V serves as the master controller for the whole system. Each MIDI-compatible device runs on its own channel, which means that they can receive dedicated MIDI commands from the Musicom’s presets.
The MIDI chain is as follows:
- MIDI output of the Musicom Lab’s MK V sends the MIDI to the rack’s front panel via the cable snake.
- From there the MIDI signal is fed to the Voodoo Lab GCX.
- The GCX sends both the MIDI signal and phantom power to the MIDI Solutions T8.
- The MIDI Solutions T8 serves as a MIDI-splitter feeding each rack shelf, which means both G-Majors, the G-Lab taking care of the Bogner’s channel switching, the Marshall JVM head, as well as the Axe FX. Each unit is fed from a dedicated MIDI Solutions T8 output, thus keeping the MIDI chain as short as possible.

All the MIDI -units are able to receive programme change commands (PCs), which we programmed into the Musicom Lab’s preset patches, which in turn means that the commands are sent automatically, whenever the presets are activated.

For the testing purposes all effects running in the Morningstar ML5’s loops, as well as the units connected to the amplifiers’ FX loops, can be switched by hand from their own front panels. The Lehles, too, can be switched manually without any MIDI commands.

To make using the whole rig as simple as possible, we took advantage of Musicom Lab’s Instant Access-modes. You can access the different Instant Access-modes by pressing a certain footswitch, which then allows you to switch the effects on and off directly using the looper’s footswitches and bypassing the presets. This goes for the pedalboard, as well as for the rack effects and the GCX. This makes improvised playing much easier, because you can also access sounds and combinations that you haven’t preprogrammed in your presets.
Programming a presets
Even though this rig seems very involved and complicated, programming a looper preset is actually quite logical and straightforward, as long as you stick to a certain workflow.

First off, you have to choose the amp or amps the signal is meant to be sent to. We preassigned all possible combinations in the memory slots of the Lehle units mounted in the rack. This allows us to call up any amp combination from the Lehle switchers by sending simple PCs with predetermined values. Both Lehles run on the same MIDI channel, meaning they react in tandem, without the need to send dedicated commands to each unit.

Next you have to choose the correct amp channel. This is achieved by sending MIDI commands, either directly to the amp (Marshall JVM and Axe FX), or in the Bogner’s case to the G-Lab MAC 4.4 relay switcher.
The next step is to select the effect you want to use, using the Musicom Lab’s Instant Access key: First up are the effects on the pedalboard, next you chose the effects covered by the Morningstar looper, and lastly you select which amp-specific effects are switched on with the GCX looper.
The final step is to select the correct effect patches for the MIDI-controlled effect units, in order to input the correct patch numbers into the looper’s preset memory.
Delivery
For the delivery, we had packed a whole bunch of additional cables, as well as a few more Lehle P-Splits, to deal with any possible glitches. We we're certain that there would be a noise of a some kind, that we would need to track down.

In the end, getting the rig up and running was a much easier and smoother ride than what we had anticipated. The whole system worked perfectly from the word “go”, and once we had hooked up all parts of the rig, and adjusted all the main parameters, we asked the client to play the rig for a little while.

He supplied us with a wish list of items to be corrected, changed or fine-tuned, which we did right at his rehearsal studio. It would have been sheer nonsense to disassemble and transport the whole rig back to our workshop.

The rig also seemed to be quite easy to expand, should the need arise: Our client already entertained thought of adding a fifth amplifier, which could be done easily. We would need ony a one more splitter and rerout of cables a bit. There were also a number of MIDI outputs left unused, giving him the option to control additional pieces of gear, if necessary.

Listening the blast of three guitar amps running together gave us goosebumps – which meant we had succeeded in our task. Don’t get us wrong, we simply love making pedalboards, but, still, assembling such a mother-of-all-rigs has its own specific charm. Would this be a natural start for Custom Racks?
24.3.2020 Eetu Lehtinen and Kimmo Aroluoma
Eetu Lehtinen is Custom Boards’ pedalboard technician and a gifted craftsman, who is in charge of wiring up our boards. In his spare time Eetu plays the bass guitar in the bands Demonic Death Judge, ssSHEENSss and Burweed.
Kimmo Aroluoma is the owner of Custom Boards Finland. He is a veteran guitar tech who has toured for years with Finnish bands HIM, Amorphis, Michael Monroe, The Rasmus and Von Hertzen Brothers. Today he designs pedalboards and runs his own web shop in Helsinki, Finland.
*****
If you have purchased all the parts and components but get a feeling that you might not be up to the task after all, we can make your pedalboard for you, using the components you have bought from us. Don’t worry, we won’t let anything go to waste.
START BUILDING YOUR PEDALBOARD TODAY.
Fill in our planning form


